

Customizing iOS Navigation Bar and Tab Bar colors
Customizing the look and feel of an application is very important when communicating your brand's personality inside the software with which your users interact, it gives the application an identity, it can convey feelings, and most importantly, it gets designers off our backs after they so persistently insisted we implement the design they poured so much effort into creating.
All joking aside, it is an important step that many developers find to have low priority, but can have a huge impact on the user experience that can define whether a user returns to the app or not. In this post then, I will show you the steps that are necessary for you to customize the NavigationBar and TabBar colors on your iOS application.
While this is a Xamarin Forms app, all the code goes inside the iOS project, and while this is C#, the same steps are required for Swift or Objective-C.
The UINavigationBar
This is the bar that holds the title and any UIBarButtonItem inside of an iOS app, some apps like Facebook and LinkedIn change the bar color itself to the main color of their brand, some others, like Evernote or Twitter, change the color of the buttons. Changing the color of the title is also sometimes necessary. Doing any of these changes are done inside the AppDelegate class, found on any iOS project.
Like I mentioned, while the specific app that I'm building is a Xamarin Forms app, since these changes happen on the AppDelegate class, this is going to be the same for any Xamarin project, in fact, except for the language being used, it will be the same for other iOS projects that you may create on Xcode as well.
Inside the AppDelegate class, you will find (or will be able to override) the FinishedLaunching method, which is invoked when the application has loaded and is ready to run. Here is where you will want to make any UI changes, including those to the UINavigationBar.
Through the UINavigationBar class, you'll have access to the Appearance property, which contains the values for the bar tint color and the tint color, which you can easily change:
UINavigationBar.Appearance.BarTintColor = new UIColor(245 / 255f, 246 / 255f, 247 / 255f, 1.0f);
UINavigationBar.Appearance.TintColor = new UIColor(90 / 255f, 36 / 255f, 191 / 255f, 1.0f);
The BarTintColor is the color of the bar itself, if you want your app to look like the Facebook or LinkedIn apps, here you can set the main color of your brand.
The Tintcolor is the color that will be applied to any UIBarButtonItem that is added to the bar, Facebook and LinkedIn set this to be white (or almost white), but Evernote and Twitter set it to the main brand color, while the bar itself remains white (or some shade of gray).
You can also change the text color, though this requires you to call a method:
UINavigationBar.Appearance.SetTitleTextAttributes(new UITextAttributes()
{
    TextColor = new UIColor(112 / 255f, 112 / 255f, 112 / 255f, 1.0f)
});
While this color often remains in the default black, if you change the bar tint to your main color, maybe you should change this to white. In my case, I just changed the default black color to a dark gray color. Note that this color does not apply to large titles, but will be used when those titles are "small":


Also note the way I'm setting the values for RGBA (red, green, blue and alpha). These have to be in a range of 0 to 1 and float. The easy way is to perform the division of the decimal value for each channel by 255 (the maximum value). I also use an f at the end of the numbers so the division returns a float value. Since I don't want any transparency, I set the alpha to be 1.
Here you can see the result on a navigation bar that contains bar button items:

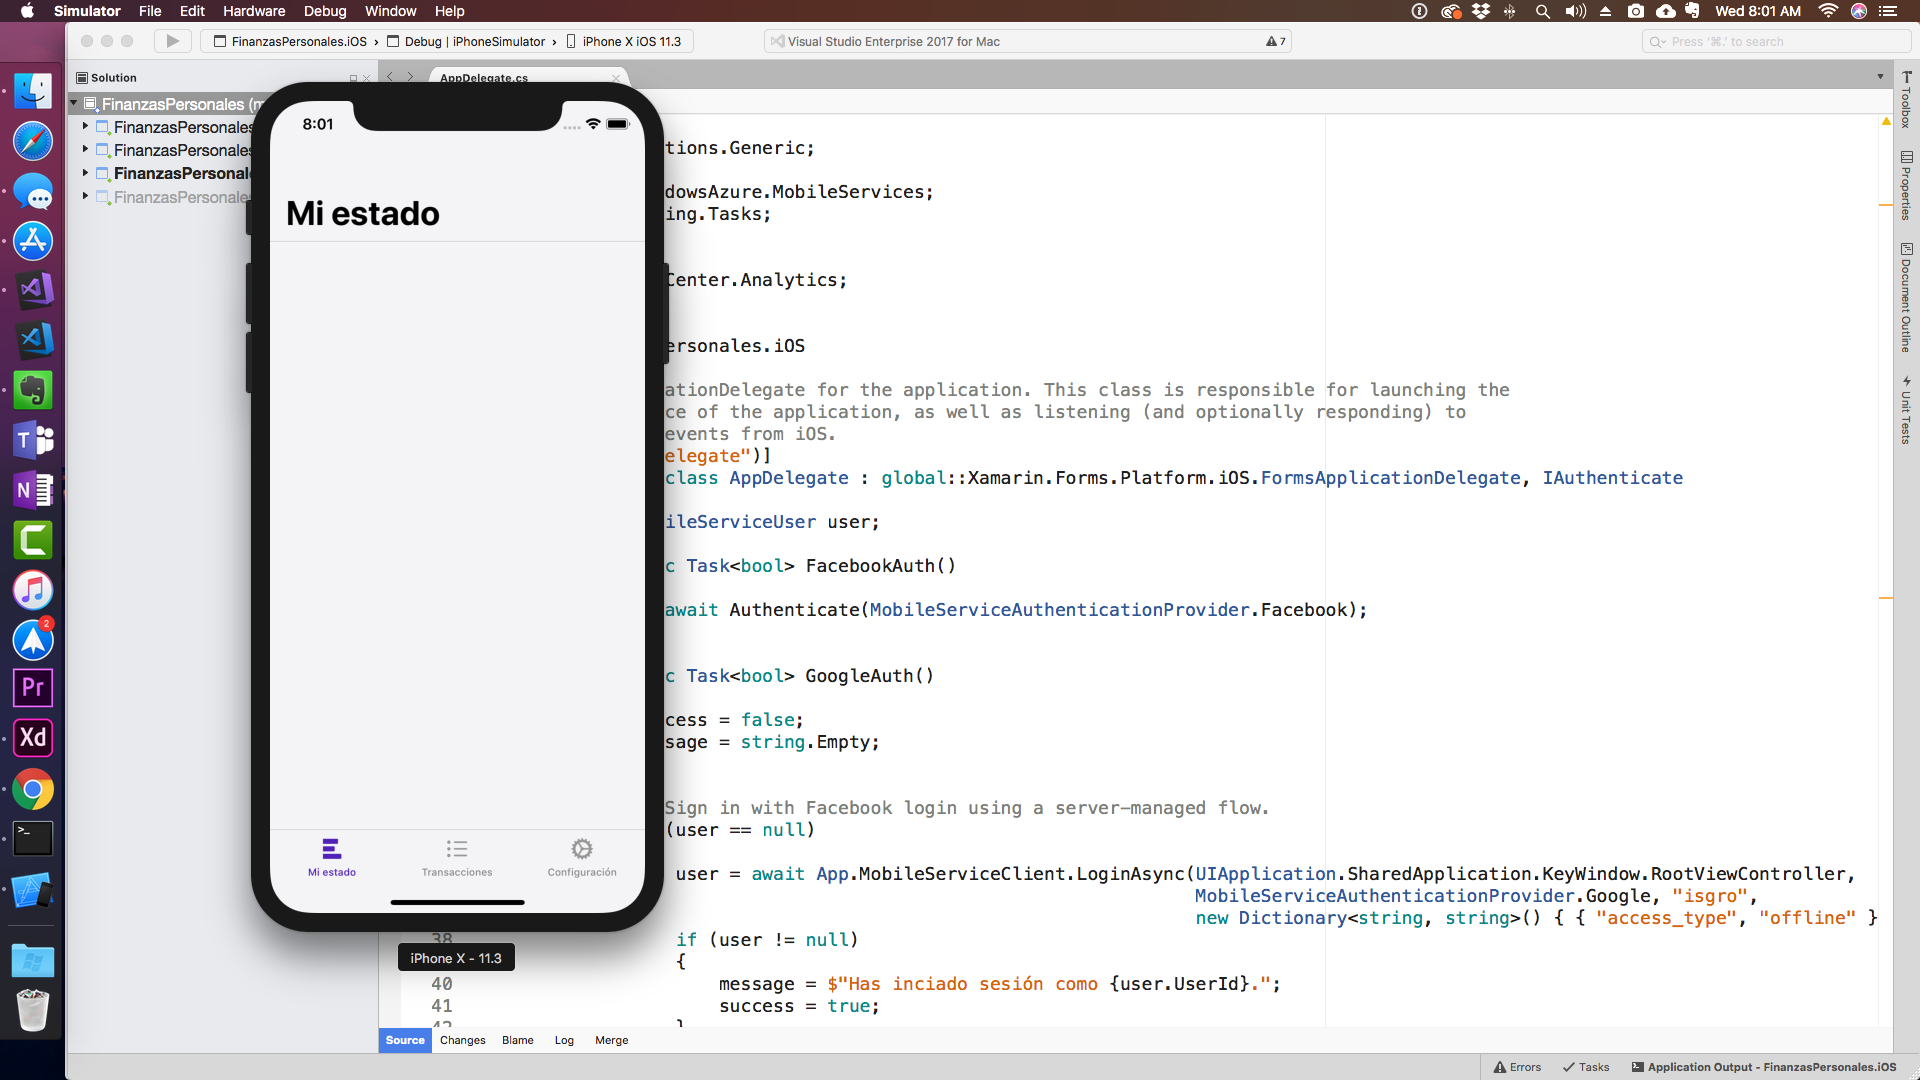
UITabBar
Setting the colors for the TabBar will be very similar, also inside the FinishedLaunching method, also using an Appearance property, you can change the tint color, the selected image tint color, and the bar tint color.
This code right here is setting a tint color that is applied to the selected tab, and a tab bar tint color identical to the navigation bar tint color.
UITabBar.Appearance.SelectedImageTintColor = new UIColor(90 / 255f, 36 / 255f, 191 / 255f, 1.0f);
UITabBar.Appearance.TintColor = new UIColor(90 / 255f, 36 / 255f, 191 / 255f, 1.0f);
UITabBar.Appearance.BarTintColor = new UIColor(245 / 255f, 246 / 255f, 247 / 255f, 1.0f);
The end result is this:

Indeed this is everything that is needed, I hope you found it useful, and I'd love it if you shared with me any designs you created with what you learned in this post.
If you want to learn more about iOS and Android app development, you can do so by enrolling to my 25-hour long "The Complete Xamarin Developer Course: iOS and Android" course

